Saturday, December 31, 2011

What Are Your Foodie New Year’s Resolutions?

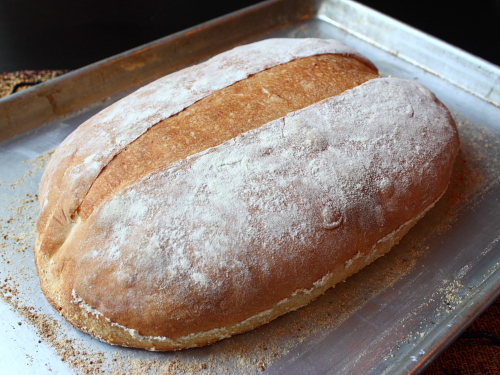
Photo (c) Flickr user nImAdestiny.
I gave up on New Year’s resolutions a long time ago. Let’s face it, if you haven’t learned French by now, it’s not happening. Sure, that new elliptical machine would be a great way to get in shape, but what's more likely is you becoming the proud owner of a $1,200 coat rack that can read your pulse rate. The only people that actually keep New Year’s resolutions are the ones that don’t need to make them.

However, I do like to set a few food related goals for the upcoming year. I’m not sure when, but I will do a quinoa recipe in 2012. I’m going to make Italian sausage. I’m planning on filming a “how to turn corned beef into pastrami” video, which I’ve done for About.com, but not on Food Wishes. I want to show you how to make perfect hash brown potatoes.

Anyway, those are a few of my New Year’s foodie resolutions – what about you? Do you have any culinary accomplishments you want to achieve in 2012? If so, please share, and we can all have a toast tonight to every one of them coming true. Enjoy!

Tuesday, December 27, 2011

Roast Tenderloin of Beef with Porcini-Shallot-Tarragon Pan Sauce – It’s the Heat and the Humidity!

This New Year’s Eve splurge special is dedicated to all of you who’ve used the cost as the excuse for not doing a beef tenderloin, when the real reason is the intense fear of screwing up such an expensive cut of meat.

The thought of paying all that money for such a luxury item, only to have it end up a dry, overcooked platter of corn-fed humiliation, is just too much to take. Well, I have some very good news. Using these very simple techniques, anyone can achieve a perfectly pink and juicy roast.

One secret is the slow oven, which allows for a gentle roasting, and produces an even, rosy hue throughout the muscle. The other trick is roasting the beef on top of the pan sauce, which not only flavors the meat, but also humidifies the oven for a moist, aromatic cooking environment. 

Of course, both of those are dependent on you being able to give this a serious sear before it goes in the oven, but I have complete confidence in you.

This particular cut of beef is extremely tender, but very lean, and so cooking it beyond medium-rare is not recommended. If you like your beef medium-well and beyond, you are completely wasting your money on one of these beauties. I’m usually not that militant about having to eat steaks medium-rare, but this time I really must insist.

Anyway, if you follow these pretty basic steps, and are in possession of a quality, digital meat thermometer, there is no reason why you can’t get the same results you see here. By the way, the roughly 15 minutes per pound roasting time is just a ballpark, so be sure to start checking the temp early, so you can catch it at the perfect doneness. I hope you give it a try. Enjoy!


Ingredients (serves 6):
2 1/2 to 3 lb beef tenderloin roast
salt and pepper to taste
1 tbsp vegetable oil
2 tbsp unsalted butter, divided
1/2 cup sliced shallots
1/4 cup tarragon white wine vinegar, or plain white wine vinegar
1 cup veal stock or chicken broth
1/4 cup cream
1/3 cup dried porcini mushrooms, soaked and diced
1/2 cup liquid from porcini mushrooms, more if needed
1 tbsp minced fresh tarragon

Saturday, December 24, 2011

Wishing You a Very Merry Christmas!

(c) 1956 Francis P. Johnson
Michele and I are heading to Windsor, CA, for Christmas with the family, and before we do, we want to wish all of you who celebrate, a very Merry Christmas! May you be surrounded by lots of loved ones, and plate after plate of great food.

I'll be taking a little holiday break from the blog until Tuesday, when we’ll be back with a brand new video recipe, so stay tuned for that. Have fun, play nice, travel safe, and as always, enjoy!!

Friday, December 23, 2011

No-Knead Beer Bread – My Second Favorite Use for Belgian Ale

The hardest thing about this ultra-simple, no-knead bread recipe is somehow managing not to drink that last bottle of beer. In fact, if this recipe goes viral, you may actually see a “7-Pack” introduced into the market.

My beer drinking experience far exceeds my beer bread baking experience, so I’m not entirely sure exactly what the beer does here, but anecdotal evidence suggests it does delicious and beneficial things. Besides, it just feels right. When I stirred that bubbly brew into the foamy sponge, I swear I could hear the yeast moaning.

This is adapted from a recipe that my Uncle Bill adapted from our famous no-knead ciabatta bread recipe. That dough only uses a pinch of yeast, and takes about 18 hours to rise, but my Godfather proved that you could get similar results in just a few hours with this short-cut method.

So, if you were using the rising time as an excuse for not making homemade bread, well then, now what are you going to use? This really is an easy, fun, and fast recipe, and you’ll be amazed at how great the results are, even for the most inexperienced bread maker. Enjoy!


Ingredients:
For the sponge:
1 1/2 teaspoon dry active yeast
1/2 cup AP flour
1/2 cup warm water (about 100 degrees)
Then:
12 oz bottled beer
18 ounces AP flour (about 4 cups)
1 1/2 teaspoon fine salt

Thursday, December 22, 2011

Crispy Crusty Potato Pancakes! (Symbolic Oil Sold Separately)

There's nothing like freshly fried potato pancakes, and thanks to Hanukkah, you can't visit a food blog right now without seeing a gorgeous-looking potato latke recipe.

I'm quite proud of my version, so I decided to repost this video from last year. We garnished this with smoked salmon, but truth be told, my favorite way to enjoy them is topped with applesauce and sour cream. I hope you enjoy seeing this potato pancake recipe again, and if you’re watching this for the first time, I really hope you give it a try. A happy
Hanukkah to all those celebrating, and as always, enjoy!

Potato Pancakes – Squeeze and Be Squeezed


Click here for the original post and ingredient amounts.

Wednesday, December 21, 2011

Gingerbread Cake with Lemon Glaze – A Not-So-Secret Christmas Tradition

Unlike some families, we don’t have a set-in-stone Christmas dinner menu. It really varies year to year. We’ve tried just about every holiday roast imaginable, and I don’t think we’ve even had the exact same side dishes twice, but when it comes to dessert, that’s a whole other story.

The meal must end with this gingerbread cake and it’s glistening lemon glaze. My wife Michele makes this every year, and uses a recipe she adapted from the Silver Palate Cookbook, which despite being very simple, always gets rave reviews.

Of course, she adds a few secret, extra-exotic ingredients (I can’t confirm or deny that one is cardamom), which I didn’t use here, but I’ve always believed married couples should have there own unique gingerbread cake recipes, and mine features a little dash of Chinese five-spice instead.

Was it as good as Michele’s annual Christmas offering? Of course not (see why I’ve stayed happily married for 22 holidays?), but it was very delicious, and I’m sure you’d thoroughly enjoy it. So, if you’re looking for a new addition to your holiday dessert table, I hope you give this a try. Enjoy!


Gingerbread ingredients for one 8 or 9-in square cake:
1 2/3 cups all-purpose flour (8-oz by weight)
1 1/4 teaspoon baking soda
2 rounded teaspoons ground ginger (3 if you like it spicier)
1 teaspoon cinnamon
3/4 teaspoon salt
1/4 teaspoon Chinese five-spice powder
1 egg, beaten
1/2 cup white sugar
1/2 cup dark molasses
1/2 cup vegetable oil
1/2 cup boiling water
*Bake at 350ºF or about 35 minutes.
For the glaze:
1 cup powdered sugar
1/4 cup lemon juice
1 tbsp lemon zest

Tuesday, December 20, 2011

It’s Crème Fraiche Season

Crème Fraiche is one of those extra special ingredients that seem to pop up in recipes this time of year. While sour cream may be fine the rest of the time, holiday menus demand something a little more luxurious. Well, instead of splurging at the grocery store, why not make your own? Follow this link to see how simple and easy homemade crème fraiche is, but don’t wait too long, as the process takes a couple days. Enjoy!


Monday, December 19, 2011

A Quick and Easy Cassoulet Recipe – Pork & Beans with Benefits

Of course you can’t make a real cassoulet in an hour, but you can make this very acceptable cheater version, and as long as you manage expectations, you’re in for a great, cold-weather meal.

Real cassoulet is an involved process, with several days of prep just to make the various meats served in this rustic bean casserole. Once everything is prepared, the dish bakes for hours, during which time the ritualistic crust forming and re-forming occurs.

Buttery breadcrumbs are scatted over the top, and when they form a crusty, golden brown layer, they’re pushed down into the bubbling mixture, and new crumbs applied. This is done several times, creating the dish’s signature texture. A creamy, aromatic, not-too-wet-or-too-dry bean mixture into which is suspended the chunks of succulent meat.

Here, we’re taking lots of short cuts. Chicken thighs replace the classic, and time-consuming, duck confit; canned beans replace dried; and bacon serves as a convenient substitute for other, more involved smoked pork options.

While it will be tempting to dig right into this as soon as the final “gratin” is formed, please follow the advice in the video, and let your cassoulet rest in the hot oven for 15 minutes. This will allow the beans and buttery crumbs to absorb the last of the excess liquid, and make for a better texture.

By the way, please adjust your seasoning depending on the sausage used. Mine was plenty garlicky, so I didn’t add any additional cloves. You’ll also have to taste and alter the salt, depending on whether your bacon and sausage shared enough with the rest of the ingredients. I hope you give this hearty, cold-weather classic a try soon. Enjoy!


Ingredients for 4 large portions:
4 oz bacon, sliced
8 oz spicy, garlicky, smoked pork sausage, sliced
12 oz boneless skinless chicken thighs, cubed
1 onion, diced
salt and pepper to taste
2 cups chicken broth, or as needed
2 (15-oz) can white beans, drained, rinsed
1 1/2 tsp minced fresh rosemary
1 1/2 tsp minced fresh thyme
cayenne to taste
4 tbsp melted butter
1 cup plain breadcrumbs
1/2 cup finely grated Parmigiano-Reggiano cheese

Friday, December 16, 2011

Chocolate Mint Brownies – Behold, The Tree of Disappointment

I loved everything about these brownies, except the flavor. I love mint, I love chocolate, and I love chocolate mints, but for whatever reason, I don’t like chocolate mint brownies. It’s quite a personal mystery.

My wife Michele’s theory is that since we love the pure chocolately goodness of classic plain brownies, the addition of that extra layer of flavor, especially one as distinctive as mint, just throws everything off. That could be.

Also, I don’t like the combination of nuts and mint, and so these didn’t contain walnuts or pecans like they usually would. Maybe it’s nut denial that has me in this anti-mint mood. Anyway, enough about my problems, if you like chocolate mint brownies, which based upon all the requests I got, many of you do; you’ll probably love these.

I’ve used a very stripped-down method here that requires almost zero technique, and uses only cocoa powder to achieve a dense, chewy, very chocolatey brownie. I hope you give these a try, and if you don’t enjoy mint either, just leave them un-iced, or add another flavoring like vanilla, orange, or rum extract. Enjoy!


Ingredients:
1/2 cup (1 stick) unsalted butter
1 1/8 cups sugar
3/4 cup unsweetened cocoa powder
1/4 teaspoon salt
1/2 teaspoon vanilla extract
2 large eggs
2/3 cup all-purpose flour
For the icing:
1 cup powdered sugar
1/4 tsp mint extract, or to taste
2 tbsp milk

Wednesday, December 14, 2011

Italian Rice Croquettes aka Rice Balls aka Arancini – Back by Popular Demand… Aunt Angela and Uncle Bill D’Arduini!

I just flew back from New York, and boy, are my jokes tired (as you’ll hear). So is everything else, and there’s no rest for the weary as I pack for a quick trip to see the team at Allrecipes.com in Seattle. So, time is short, and I’m posting this incredibly delicious Italian rice croquette recipe, sans extra wordy article.

There isn’t much to add anyway; what you see is what you get. This great appetizer was filmed at a recent family dinner at my Aunt Angela and Uncle Billy D’Arduini’s, and if they sound familiar, they should! They’ve been featured on the blog numerous times; in such smash hit recipes as, Cabbage Rolls, Chicken D’Arduini, and Homemade Pasta.

You can definitely do this recipe completely vegetarian, by skipping the giblets, or switch those out for almost any other cooked meat. Sausage, prosciutto, or ham are just a few of the many options.

When it comes to the rice, we used a standard long rain, and went with a 2 parts water to 1 part rice ratio. You want fully hydrated and completely cooked grain. Al dente rice is not going to work here. Slightly overcooked is not a problem.

Anyway, I'd like to thank Aunt Angela and Uncle Bill for sharing their recipe, and I hope you can give it a try soon. It would be a great addition to any party menu. Enjoy!


Ingredients:
*Sorry, I never found out how many this makes, but I’m guessing about 70-80
2 pounds cooked chicken giblets (gizzards and hearts)
2 cups rice cooked in 4 cups salted water
2 cups grated Parmesan cheese
2 tbsp parsley, optional
1/4 cup breadcrumbs
2 large eggs
1/2 cup marinara sauce
salt and pepper to taste
plain breadcrumbs, as needed
vegetable oil for frying
lemon wedges

Tuesday, December 13, 2011

Heading West

I'll be flying from New York to San Francisco today, so my apologies for any delays in answering comments or emails. I will be back at it on Wednesday with what hopefully will be a fabulous new video recipe (possibly pictured below, but you'll have to wait to see for sure). Stay tuned!


Monday, December 12, 2011

Homemade Chipotle Oil - Better Red Than Dead

There’s nothing wrong with giving homemade holiday gifts, just as long as they’re something somebody would actually want and use. Thanks to things like fruitcakes so dense they have their own gravitational fields, making edible gifts has gotten a bad name, but that’s not an issue with this chipotle oil, especially if that certain someone on your gift list likes the spicy stuff.

As I mention in the video, this could work with lots of different spices, and not only does it look pretty cool, but it's a tasty and versatile addition to any foodie's pantry. Just be careful to stay away from using fresh ingredients, like garlic and green herbs.

I’m too busy (lazy) to go into detail, but if you can run into some serious food born illnesses bottling fresh ingredients, so be sure to thoroughly research any potential additions to these flavored oils. Nothing wrecks that festive holiday vibe like being charged with involuntary manslaughter. Enjoy!


Ingredients to make 2 (8-oz) bottles:
2 cups vegetable oil
2 rounded tablespoons ground dry chipotle

Sunday, December 11, 2011

What About Lasagna?

Are you having trouble deciding what classic Christmas roast to do this holiday? Well, maybe that’s a sign you should take things in totally different, and much more Italian, direction. Follow this link to see the Christmas lasagna recipe video I originally posted last December. Enjoy!


Friday, December 9, 2011

My Goose Was Already Cooked

Many years ago I remember trying to cook a Christmas goose. It wasn’t a total disaster, but I do remember gamey, less-than-tender meat, and copious amounts of grease. So, despite several food wishes for this iconic holiday roast, I decided it wasn’t something I wanted to revisit.

Then, I received an offer to try a pre-cooked, smoked goose from Schiltz Foods. They’re the country’s largest goose producer, and a sponsor of this year’s Tasty Awards. They were offering their geese to select Tasty Award nominees to try out, so I decided to give it a whirl.

I’ll admit to being skeptical since reheating pre-cooked meats usually don’t produce the best results. However, this turned out amazingly well. As you’ll see, the skin roasted up perfectly crisp, and the meat was moist and flavorful. By the way, I did zero food styling in this video, and the magazine-quality final product you see in these photos was exactly what came out of the oven.

Since the bird is brined and smoked, the taste is that of a very rich, moderately salty ham. So, if you want a Christmas goose that actually tastes like goose, this may not be your best choice. But, if you’re considering a holiday ham, and want a real showstopper in the center of the table, I think this is a great choice. Think of it as a delicious ham with wings.

I sacrificed half the wings to make a basic reduction sauce, and the subtle smokiness worked wonderfully with the red wine, balsamic vinegar, and blackberry notes. The sauce is certainly optional, as this could be served plain with just some cranberry sauce on the side. I hope you’re able to give this very easy-to-prepare, gorgeous roast goose a try. Enjoy!


1 whole pre-cooked smoked goose (mine was about 6 pounds)
For the sauce:
2 flat sections of goose’s wings
1/2 cup red wine
3 cups water
1 star anise
1/2 tsp fresh ground black pepper
1/4 cup aged balsamic vinegar
1/4 cup blackberry jam
2-3 tablespoons cold butter, cut in cubes
salt to taste

Disclaimer: As stated above, this post was made possible by Schiltz Foods, Inc., who provided the smoked goose free of charge. I’d like to thank them for bringing goose back into my life. If you want more information, or are interested in ordering a goose for the holidays, please follow this link to their official website.

Wednesday, December 7, 2011

Let’s Get Ready to Rum Ball!

I want to thank a Twitter follower of mine, RookieKoo, for giving me the idea for today’s Michael Buffer-inspired post title. Of course, if you’re not familiar with the iconic boxing ring announcer’s catchphrase, then none of this will make any sense, and you’ll just have to trust me when I tell you it was an amusing reference.

There are hundreds of ways to make rum balls, but this one’s my favorite method. It’s very easy, especially if you have stale brownies lying around. I know, that never happens, which is why I’m linking to an all-purpose brownie recipe below the post. This will also work nicely with store-bought brownies, but stay away from anything that’s frosted. We don’t want to add any additional fat into the recipe, since that will hinder the absorption of the rum.

The amount of rum you add depends on how cakey and/or dry your brownies are, but for a half-pound, you’ll probably need between 1/4 and 1/3 of a cup to soak the crumbs sufficiently. A proper rum ball should be a fire hazard. By the way, I’m not responding to any comments asking about how to make these without using rum. In my humble opinion, you can’t.

The other issue I'm not going to be a big help with is altering the type of chocolate. I used a quality dark chocolate (70% cocoa), which worked beautifully for this, and hope you do the same. I don't have a lot of experience working with chocolate, so I'm not sure what will happen if you want to use white, milk, or other kinds of chocolate for the coating.

I realize these are more of a candy, than a cookie, but after about a half-dozen rum balls, culinary semantics will be the furthest thing from your mind. I hope you give them a try on your holiday dessert table. Enjoy!


Ingredients for about 20 small rum balls:
8 ounces stale chocolate brownies, crumbled
1/4 to 1/3 cup dark rum, or as needed
4 oz dark chocolate (I used Lindt Dark Chocolate 70% Cocoa)

NOTE: For a quick and easy brownie that will work well for these rum balls, check out this recipe from Allrecipes.com. I recommend checking out the comments on that recipe page before starting.

Tuesday, December 6, 2011

Hello from the Land of the Garbage Plate

I’m currently in Western New York visiting my family, so I thought I’d repost this video I shot way back in 2007, featuring my attempt to eat this region's most infamous culinary creation, the Garbage Plate.

The original Garbage Plate was created at Nick Tahou’s in Rochester, but this version was shot at my favorite local lunch spot, Charlie Riedel’s, in Canadaigua, NY. I highly encourage you to read the original post here for more information, as well as some very entertaining reader comments. Enjoy!

Monday, December 5, 2011

Merguez Sausage & Rice Stuffed Acorn Squash – Let’s Go Edible Bowling

I’ve received a few requests lately for a demo on how to do chili in an edible bread bowl. I’m not sure if these people don’t know it’s simply a round loaf with a hole dug out of it, or if they’re just into watching me teach incredibly obvious things, but that’s one food wish that may not come true. What’s next, watch Chef John make ice?

Anyway, unlike the aforementioned bread bowl, this sausage and rice stuffed acorn squash recipe is an example of an edible vessel that begs for a detailed demonstration. The stuffing is very easy, as is the cooking method, but the acorn squash prep does need to be done carefully and with precision.

As far as the ingredients go, this will work with any sausage, but please keep in mind you’ll want to adjust your seasonings depending on what you choose. I used mint because it pairs very well with the spicy lamb sausage, but basil or parsley may work better with a hot Italian sausage, for example.

This really is a recipe that’s greater than the sum of its parts. I love the way the flavors seep deep into the soft, sweet flesh of the squash. What a great cold weather meal. I hope you give it a try soon. Enjoy!


Ingredients for 4 Portions:
2 acorn squash, halved, seeded
8 oz spicy lamb sausage, or any raw sausage
1/2 tsp salt, or to taste
1/4 tsp freshly ground black pepper
1/2 tsp ground cumin
1/4 tsp ground cinnamon
1/2 red bell pepper, diced
1 tbsp chopped fresh mint
3 tbsp buttermilk or plain yogurt
1 egg
1 cup cooked rice
1 tbsp plain breadcrumbs
1 tbsp grated Parmigiano-Reggiano cheese
2 tsp olive oil
*Bake at 350 degrees F., loosely covered for 1 hour, then uncover for 30 minutes or until tender.

Friday, December 2, 2011

Deboning a Turkey by Proxy

After posting my turkey ballotine photos from Thanksgiving, I was inundated with requests (demands) for a video demonstration. Of course, that would have meant buying and eating another turkey, so I decided to take the easy way out and post this clip from one of my heroes, Jacques Pépin.

This is from pepinfan’s YouTube page, and it looks to be an episode from the venerable chef’s public television series. This was the exact same technique I used on the turkey, except I needed to use a knife for several steps that he's simply doing with his hands. Hopefully it gives you some idea how it’s done. Enjoy!

Thursday, December 1, 2011

Easy as Chocolate Pecan Pie

Despite the colloquial idiom, pies are not that easy, and in my opinion, it’s not the dough that separates the good from the great, it’s the fillings. With fresh fruit pies, you have to worry about too much or too little liquid. Custard-based fillings are texturally tricky; and don’t even get me started on lemon meringue.

However, there’s one category of pie whose fillings are so easy, they’re nearly impossible to mess up. That would be the seasonally appropriate nut pie. If you can work a whisk, and set a timer, you have what it takes to excel in this genre.

We added a handful of chocolate chips, but the recipe is based on this one from Allrecipes.com, which I came across looking for corn syrup free versions. By the way, it’s not that I think corn syrup is a “bad” ingredient, I just know that most people don’t have it on hand, and I’d hate for them to buy a whole bottle when a perfectly wonderful pie can be made without it.

In fact, the filling is so deliciously decadent the crust is almost an afterthought. If you ever want to rationalize buying a frozen pie shell, this is your chance. Of course, if you want real “homemade,” you can check out this video recipe for making pie dough, but the point is, either way your chocolate pecan pie is going to rock. Enjoy!


Ingredients:
1 9-inch pie shell
2 eggs
1 cup light brown sugar
1/4 cup white sugar
1/2 cup butter
1 tablespoon all-purpose flour (I didn't add in this recipe, but suggest you do. Add with the sugars.)
1 tablespoon milk
1 teaspoon vanilla extract
1/3 cup chocolate chips
1 1/2 cup chopped pecans