I wanted to wish you all a very healthy and happy Thanksgiving holiday, and to let you know we’ll be taking a few days off to eat, drink, and rest; but mostly eat and drink. And when I say “days off,” I really mean days off. As much as I’d love to spend the holiday on my laptop, giving you all last-second cooking tips, I’m contractually obligated to take some time off, and who am I to question HR?Have a great Thanksgiving, and we’ll be back with brand new videos next week. And no, they will not feature turkey or pumpkin. So, stay tuned, and as always, enjoy!
Most normal people cook a bigger turkey than they need, so
they can enjoy some leftovers. There’s nothing better than a fresh turkey sandwich,
or three, but after a couple days, that bony carcass is that last thing you
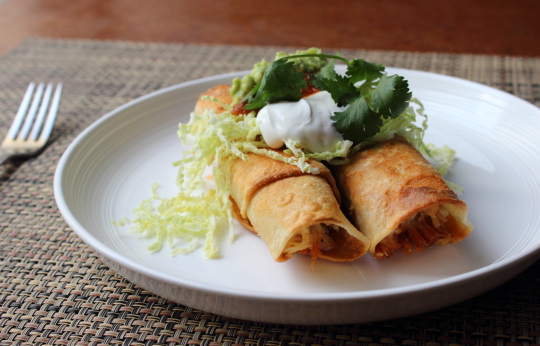
want to look at; and that’s where these crispy flautas come in.
As I joked about in the video, when it comes to leftovers, the
“add cheese and fry” system is a proven crowd pleaser, but to hedge our
bets, we’re also topping with guacamole, sour cream, and salsa. This creates
something so different from the holiday meal that you might forget where the
turkey actually came from. Depends on how much you’ve been drinking.
Regarding my comment about pre-grated cheese being coated
with saw dust – many people on YouTube thought I was joking, but this really is
true. That shredded stuff in the bag is coated in a fine cellulose dust, which
prevents the pieces of cheese from clumping together. The good news is, grating
cheese only takes a minute, and almost anyone can do it.
And if you don’t have old turkey to make these flautas with,
eventually you will have some leftover chicken, which would obviously also work. Either way, I hope you give these delicious, crispy flautas a try soon.
Enjoy!
Ingredients for 12 large turkey flautas:
24 small, white corn tortillas 1 egg white to seal flautas, optional
*1 pound cooked, shredded turkey
6 ounces shredded pepper Jack cheese, sharp cheddar, or a
combo of the two (about 2 cups)
1/3 cup chopped green onions
salt and freshly ground black pepper to taste
*I’ll assume you’re going to use one of our turkey recipes,
so your bird will be super moist, but if it isn’t, you can always add a 1/4 cup
of chicken broth to the mixture to compensate.
- Garnish with shaved cabbage, guacamole, sour cream, salsa,
and freshly chopped cilantro
Making delicious meatballs with fatty, flavorful beef is no
great feat, but creating something as delectable using ground turkey is another
story. As the old joke goes, it may be bland, but at least it’s dry. So, you’re
going to need a very specialized strategy, and by “specialized strategy,” I
mean some cold, leftover rice.
As these simmer in your sauce or soup, the grains of rice absorb
moisture, swell up, and create a relatively tender, moist meatball. Above and
beyond that, you’ll also want to look for ground turkey thigh meat (available
at most of your higher-priced grocery chains).
By the way, like all meatball/meatloaf recipes, you can test
your seasoning by cooking a small piece of the mixture before rolling your
ball. Even though the meat hasn’t simmered in the sauce yet, at least you can see
if it needs more salt. I’ll just fry up a little patty, and adjust if need be,
and suggest you do the same.
I didn’t intend this recipe to be a Thanksgiving dinner
alternative, but now that I think about it, these could actually work. Maybe
you have a small group, or don’t like looking at a giant carcass on the table (hey,
some people are weird like that), or your in-laws are Spanish, and you want to show
them you can pronounce “albondigas.”Whatever
the occasion, I hope you give these a try soon. Enjoy!
Ingredients for about 20-24 small meatballs:
1 pound ground turkey thigh meat
1 packed cup cooked white long grain rice 3 cloves crushed garlic 1/4 cup chopped Italian parsley 1 large egg
2 teaspoons kosher salt
1/2 teaspoon freshly ground black pepper
1 teaspoon smoked paprika
1 teaspoon ground cumin
1/8 teaspoon cayenne
1/4 teaspoon dried oregano
1 tablespoon olive oil
For the sauce (I didn’t measure these ingredients, so these
are just guesses)
2 1/2 cups prepared tomato sauce
1 cup chicken broth, plus more as needed
1 teaspoon paprika
1/3 cup crème fraiche or heavy cream
1 tablespoon sherry vinegar 2 tbsp chopped Italian parsley salt and pepper to taste
Our grandparents called them the winter blues, but nowadays
we know this condition as Seasonal Affective Disorder; a melancholy
scientifically proven to be caused by shorter, darker days.
Since fall and
winter are full of those, we’re going to need some coping strategies, and this
hearty Tuscan bean soup is one of the more effective.There’s just something about that combo of smooth, silky
soup, and crunchy, crispy croutons that makes everything seem okay.
Speaking of
shorter days, this recipe is also a fantastic base for creating even more
substantial weeknight meals. Things like sausage, peppers, and/or maybe a
handful of greens, always works in this.
I tried a new method prepping our veggies; pureeing them
instead of dicing. I thought this might save time, possibly extract more
flavor, and quicken the cooking. Hey, two out of three aren’t bad! It was
faster than dicing, and the soup only had to simmer for 15 minutes, but I
didn’t think the flavor was quite as good as the classic diced veggies method.
Either way, this soup is delicious, and guaranteed to fog up
your kitchen windows. Smiley face sold separately. I really hope you give this
Tuscan bean soup a try soon. Enjoy!
Ingredients for 4 servings:
1 onion, diced
1 stalk celery, diced
1 carrot, diced
3 cloves garlic *As stated in the post, I prefer diced veggies to the ground ones I tried in the video, and if you do go for the traditional method and cut your vegetables in small cubes, you'll have to simmer you soup for about 30 minutes, or until they are sweet and very tender.
1 tbsp olive oil
1 tbsp butter
salt to taste
freshly ground black pepper to taste
cayenne to taste
1/2 teaspoon chopped rosemary
1/2 teaspoon picked thyme leaves
2 (15-oz) cans white kidney beans aka cannellini beans
4 cups chicken broth
1/3 cup crème fraiche or heavy cream
1/2 lemon, juiced
- Garnish with fresh bread cubes fried golden in olive oil, tossed
with Parmigiano Reggiano, and fresh Italian parsley.
For such a simple dish, I sure have a lot of additional info
to cover regarding the construction of this beautiful bacon, cheddar, and
spinach strata. First of which, is the somewhat unusual name. Whoever invented
this recipe apparently thought it looked like layers of rock, known in
geological circles as, “strata.”
I guess it sort of does, and probably would a lot more, if
we used a deeper dish, and did more layers. Regardless, even with just one
layer of filling in the middle, you’ll still be looking at a gorgeous
casserole, which should thoroughly impress your brunch guests…bottomless
Mimosas or no.
As I mentioned in the video, if you want something a little eggier,
a little more quiche-like, just simply increase the amount of egg custard used.
As long as your pan is deep enough, you could as much as double the eggs and
cream in this.
Speaking of the cream, this is a very rich dish, so you may
want to cut the cream with milk. In fact, many people use all milk for this,
but I do enjoy the extra butterfat the cream provides. As usual, let your
conscience be your guide.
Above and beyond that, this recipe just begs for personalization.
I’m not sure what your favorite omelet ingredients are, but I do know they
would work in this, and work really well. I hope you give this a try soon.
Enjoy!
Ingredients for 12 portions:
1 pound loaf of day old bread, cubed
12 large eggs
2 1/2 cups heavy cream, milk, or any combination thereof
2 teaspoons kosher salt
1/2 teaspoon freshly ground black pepper
pinch cayenne
pinch nutmeg
1 pound bacon, sliced and cooked crisp
1 pound fresh spinach, wilted, and squeezed dry (or enough thawed,
drained frozen spinach to cover one layer)
12 ounces extra-sharp cheddar cheese, divided (use 1/2 over
the first layer of bread, 1/4 over the spinach, and the last 1/4 over the top
layer of bread)
- Bake at 350 F. for 45 minutes or until set. Then broil for
a minute or two to brown the top.
Sometimes you don’t have a good reason
for not loving a certain recipe, and that’s how it is for me with sweet potato
pie. It just does not do it for me, and I don’t even know what “it” is.
However, I thought the same flavors could work for a holiday-inspired sweet
potato muffin, and I was thrilled with the results.
These are perfect if you have leftover
sweet potatoes during the holidays, but if not, totally worth cooking a few
just for this easy recipe. I microwaved mine for about 6 or 7 minutes, until
they were very soft, but roasting, or boiling will also work.
By the way, we’re not using sweet
potatoes for our sweet potato muffin; we’re using yams, which are actually just
incorrectly named orange-fleshed sweet potatoes.So, I guess never mind.
As I mention in the video, these muffins
are just a little bit of frosting away from being cupcakes. I’ve never
understood the allure of mini marshmallows on a sweet potato casserole, but
something tells me some “fluff” would work well on these, as well. I really hope
you give them a try soon. Enjoy!
Ingredients for 24 Sweet Potato
Muffins:
2 cups all-purpose flour
1 teaspoon kosher salt
2 teaspoons baking powder
1 teaspoon baking soda
2 teaspoons cinnamon
1/2 teaspoon ground ginger pinch of freshly grated nutmeg
4 large eggs
1 1/2 cups sugar
1/2 cup light brown sugar
1 cup vegetable oil
1/4 cup melted butter
2 cups mashed sweet potato or “yams”
1 cup chopped pecans, plus more for the top
demerara sugar for the tops
- Bake for 25 minutes at 350 F. or
until a wooden skewer comes out clean.
I had some crispy farro cakes at a restaurant a while back, and
thought they would make for an interesting video, but when I started to
research various recipes and techniques, I discovered something a little surprising;
there was no such thing as a “pure” farro cake.
Every recipe I came across had some type of filler
used to help bind the mixture together. I didn’t really understand this, until I
proceeded to make a batch using nothing but cooked and cooled farro. They
completely fell apart in the pan, and I ended up with something more like crispy fried
rice. Not a bad thing by any means, but not farro cakes.
After a few more experiments, I discovered that by using a little egg, and a touch of
finely grated Parmigiano Reggiano cheese, I was able to make it work with no
non-ancient grain additions. The whole key is the crust. By letting the first side
cook until a well-browned, crispy surface forms, the cakes develop enough
structure to make the flip possible.
One thing I failed to mention in the clip; you should check
your mixture for seasoning before frying the cakes. I used a good amount of
salt when I cooked my farro, but you should still taste and adjust.
And while these were great with the crème fraiche and golden
trout roe, there are so many ways these could be otherwise used. As
usual, I’ll be lurking on Twitter and Instagram to see what you come up with,
so fair warning. I really hope you give these a try soon. Enjoy!
Ingredients for about 6 farro cakes:
1 cup farro, not rinsed
3 cups water
1 tablespoon kosher salt
2 springs thyme
3 garlic cloves, finely minced or crushed
1/2 cup finely diced onion
- simmer covered about 45 minutes until very tender, drain
well, but DO NOT rinse
Then add:
1/4 cup finely diced red bell pepper
1/2 teaspoon freshly ground black pepper
1 ounce (about a 2-inch square piece) freshly grated Parmigiano
Reggiano (if you use real Parmigiano Reggiano, and grate it on a microplane,
you’ll get about 3/4 of a cup)
1 large egg
pinch cayenne
salt and pepper to taste 1/4 cup olive oil for frying
I always tell people I’m not a cookie eater, but I guess
that depends on the cookie, since when it comes to these gingersnaps, I can’t
get enough. As soon as these cool, I chain-eat them until they’re gone; but
that’s not my fault. I blame the amazing spicy-sweet flavor, and irresistible
texture.
Speaking of irresistible texture, I’ve got some homework for
you. You’re going to have to make batches of these to find out your own optimum
baking time. I know, it’s hard work, but you need to somehow find a way.
Depending
on the exact size of your dough balls, and how crispy, or chewy, you want
these, the baking times will vary from 10 to 15 minutes. As far as ingredients go, the crystalized ginger is
technically optional, but not too hard to find (check the bulk section), and it
really gives the cookies that extra kick of ginger flavor and heat.
Obviously,
you can also adjust the spices to suit your tastes, but don’t make these too
mild. They’re called “snaps” for reasons other than their texture. I really hope
you give these a try soon. Enjoy!
Ingredients for about 50 to 60 cookies (depending on size):
2 cups plus 2 tablespoons all-purpose flour
1 1/2 teaspoons baking soda
1/2 teaspoon fine salt
2 teaspoons ground ginger
1 1/2 teaspoons ground cinnamon
1/4 teaspoon ground cloves
1/4 teaspoon ground black pepper
1/8 teaspoon cayenne
12 tablespoons room temp unsalted butter
2/3 cup white sugar
1/3 cup finely chopped candied ginger
1/4 cup molasses
1/2 teaspoon vanilla extract
1 large egg, beaten - Bake at 350 F. for 10 to 15 minutes, depending on desired texture.